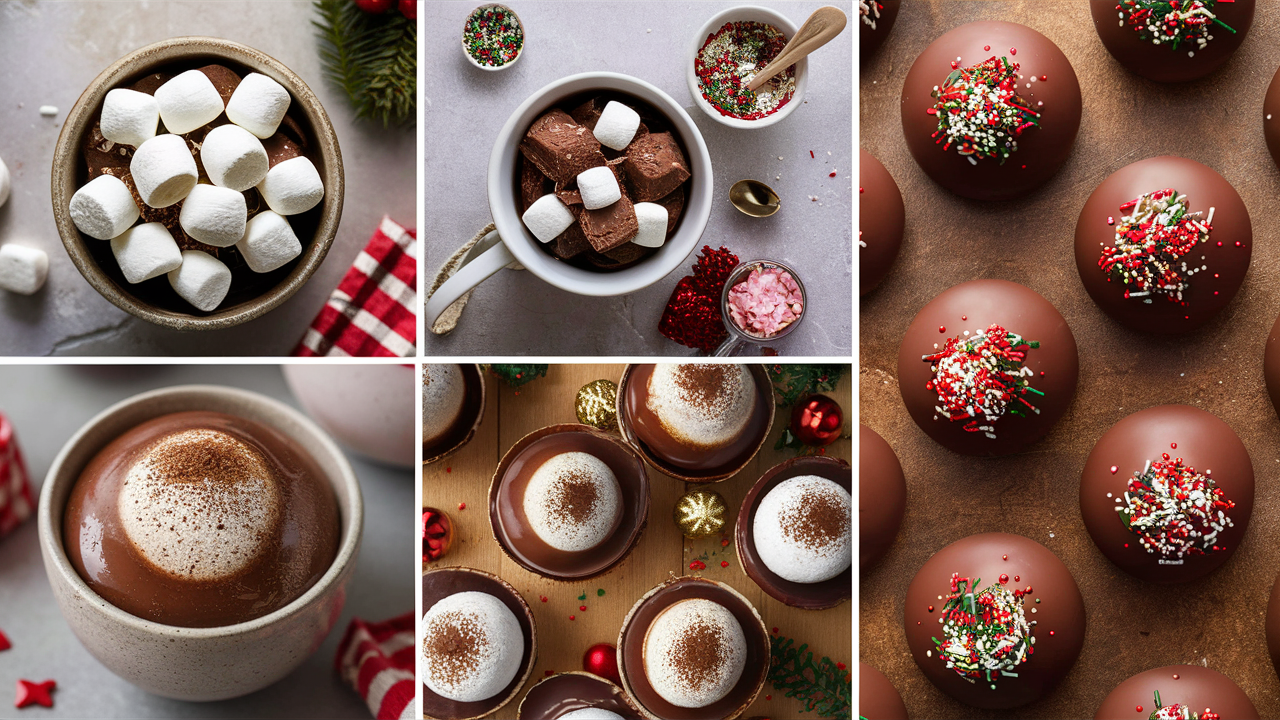
Hot cocoa bombs have quickly become a favorite treat for cold weather, thanks to their viral success on social media. These chocolate spheres, filled with cocoa powder and marshmallows, burst open when you pour hot milk over them. This creates a rich, creamy, and flavorful hot chocolate. Whether you’re making these for yourself, as a gift, or for a festive gathering, this guide will walk you through the entire process—from selecting the right ingredients to perfecting your technique.
Ingredients and Tools You’ll Need
Choosing the Right Chocolate
The chocolate you use forms the foundation of your hot cocoa bombs, so choosing high-quality chocolate that melts smoothly and tastes delicious is essential. Here are the types of chocolate you can use:
- Dark Chocolate: This type of chocolate contains a higher percentage of cocoa solids, providing a rich and slightly bitter flavor. It is ideal for those who prefer a less sweet hot chocolate.
- Milk Chocolate: A classic choice, milk chocolate is sweet and creamy, making it a favorite for many. It pairs perfectly with traditional hot cocoa fillings.
- White Chocolate: Sweet and smooth, white chocolate offers a different flavor profile. It works well with a variety of fillings, such as peppermint or caramel.
When selecting chocolate, opt for bars with at least 60% cocoa content for dark chocolate. High-quality milk or white chocolate is also a good choice. Avoid chocolate chips, as they often contain stabilizers that prevent them from melting smoothly.
Cocoa Powder and Fillings
The inside of your hot cocoa bomb should contain cocoa powder or a pre-made hot chocolate mix. Here are some options:
- Regular Cocoa Powder: Unsweetened and rich in flavor, regular cocoa powder allows you to control the sweetness of your hot chocolate.
- Gourmet Hot Chocolate Mix: For a more luxurious experience, use a gourmet hot chocolate mix. It may include added flavors like vanilla, cinnamon, or sea salt.
- Flavored Cocoa Powder: Consider flavored cocoa powders such as peppermint, caramel, or even spiced varieties for a unique twist.
Marshmallows and Other Add-ins
No hot cocoa bomb is complete without marshmallows. Mini marshmallows are the best choice since they fit easily inside the bomb and melt quickly in hot milk. You can also add other fillings to customize your cocoa bombs:
- Crushed Peppermint Candies: These add a refreshing and festive touch.
- Caramel Bits: For a sweet, gooey surprise.
- Chocolate Chips or Shavings: Enhance the richness of your drink with these.
- Sprinkles: Add a fun, colorful element.
Tools You’ll Need
To create perfect hot cocoa bombs, you’ll need a few essential tools:
- Silicone Sphere Molds: These molds shape the chocolate shells. Silicone molds are flexible, making it easy to remove the chocolate without breaking it.
- Pastry Brush or Spoon: Use this to spread the melted chocolate evenly inside the molds.
- Double Boiler or Microwave: Necessary for melting the chocolate.
- Thermometer: This ensures the chocolate is properly tempered, giving it a glossy finish and a satisfying snap.
- Small Spatula: Use this tool for leveling the chocolate edges and sealing the bombs.
Step-by-Step Instructions for Making Hot Cocoa Bombs
Step 1: Melting and Tempering the Chocolate
Start by finely chopping your chocolate into small pieces. This ensures it melts evenly. You can melt the chocolate using either a double boiler or a microwave:
- Double Boiler Method: Place the chopped chocolate in a heatproof bowl over a pot of simmering water. Stir continuously until the chocolate is fully melted and smooth.
- Microwave Method: Place the chocolate in a microwave-safe bowl. Heat it in 20-30 second intervals, stirring in between to prevent burning.
After melting, you’ll need to temper the chocolate. This step ensures it has a shiny finish and a crisp snap when set. Here’s how:
- Dark Chocolate: Heat to 120°F, cool to 82°F, then reheat slightly to 88-91°F.
- Milk or White Chocolate: Heat to 115°F, cool to 80°F, then reheat to 86-88°F.
Tempering may seem like an extra step, but it’s crucial. It helps create professional-looking cocoa bombs that hold their shape.
Step 2: Forming the Chocolate Shells
Once your chocolate is tempered, it’s time to create the shells:
- Coat the Molds: Use a pastry brush or the back of a spoon to apply a thin, even layer of chocolate inside each mold cavity. Make sure the entire surface is covered.
- Chill the Molds: Place the molds in the refrigerator for about 10 minutes to allow the chocolate to set.
- Second Layer: Apply a second layer of chocolate to the molds, focusing on the edges to ensure they are strong enough to hold the filling. Chill again until fully set.
Step 3: Filling the Cocoa Bombs
Carefully remove the chocolate shells from the molds. Handle them gently to avoid breaking. Fill half of the shells with your chosen cocoa powder, hot chocolate mix, and any additional fillings like marshmallows or caramel bits.
Step 4: Sealing the Cocoa Bombs
To seal the cocoa bombs:
- Warm a Plate: Heat a plate in the microwave until warm, not hot.
- Melt the Edges: Take an empty half-shell and place it on the warm plate for a few seconds to slightly melt the edges.
- Join the Halves: Quickly press the melted edge against a filled half-shell. This creates a seal. Hold them together for a few seconds until set. If needed, run your finger around the edge to smooth it out or add a drizzle of melted chocolate to seal any gaps.
Step 5: Decorating Your Hot Cocoa Bombs
Now that your cocoa bombs are assembled, it’s time to decorate:
- Drizzle Chocolate: Melt additional chocolate and drizzle it over the top of the bombs for a decorative finish.
- Add Toppings: Sprinkle crushed peppermint, edible glitter, or sprinkles on top while the drizzle is still wet.
- Customize: Get creative with your decorations to match the season or occasion. For instance, use orange sprinkles for Halloween or red and green for Christmas.
Step 6: Storing and Gifting
Store your hot cocoa bombs in an airtight container at room temperature for up to two weeks. If you live in a warm climate, consider storing them in the refrigerator. This prevents the chocolate from melting.
Hot cocoa bombs make excellent gifts! Wrap each bomb in a cellophane bag with a ribbon. Add a tag that includes instructions on how to use them. They are perfect for holidays, birthdays, or as a thoughtful homemade gift.
How to Enjoy Your Hot Cocoa Bombs
Using your hot cocoa bomb is fun and simple:
- Place a Bomb in a Mug: Select a large mug and place the cocoa bomb at the bottom.
- Pour Hot Milk: Slowly pour 8-10 ounces of hot milk over the bomb. The heat will cause the chocolate to melt and the bomb to burst open. It releases the cocoa powder and fillings into the milk.
- Stir and Enjoy: Stir the mixture until the chocolate is fully melted and the cocoa is evenly mixed. Top with whipped cream, a sprinkle of cinnamon, or a drizzle of caramel sauce for an extra indulgent treat.
Variations and Customizations for Hot Cocoa Bombs
Flavor Variations
One of the best aspects of making hot cocoa bombs is the ability to customize the flavors. Here are some ideas to suit your tastes or the season:
- Mocha Cocoa Bombs: Add a teaspoon of instant coffee granules to your cocoa mix. This creates a mocha-flavored drink.
- Spiced Hot Cocoa Bombs: Mix in a pinch of cinnamon, nutmeg, and cayenne pepper for a spicy kick. It’s reminiscent of Mexican hot chocolate.
- Mint Chocolate Bombs: Use mint-flavored chocolate and add crushed peppermint candies for a refreshing winter treat.
- Peanut Butter Cocoa Bombs: Add a small dollop of peanut butter inside each bomb before sealing for a rich, nutty flavor.
Dietary Considerations
You can easily adapt hot cocoa bombs to accommodate dietary restrictions:
- Vegan Cocoa Bombs: Use dairy-free chocolate and a vegan hot cocoa mix. Replace regular marshmallows with vegan marshmallows and use plant-based milk like almond or oat milk for serving.
- Keto-Friendly Bombs: Use sugar-free dark chocolate and a keto hot cocoa mix. You can also add sugar-free sweeteners or flavors like vanilla extract.
Tips for Success
Making hot cocoa bombs can be a bit challenging, especially if it’s your first time. Here are some tips to help you succeed:
- Temper the Chocolate: Properly tempered chocolate will give your bombs a shiny finish and a crisp snap. This makes them look and taste professional.
- Work Quickly: Once the chocolate is tempered and melted, work quickly to fill and seal the bombs before it cools and hardens.
- Avoid Overfilling: Be careful not to overfill the chocolate shells. Overfilling can make them difficult to seal and may cause them to break.
- Practice Patience: If the chocolate shells break or the bombs don’t seal perfectly, don’t worry. It may take a few tries to get it just right. The results are worth the effort!
The Origins and Popularity of Hot Cocoa Bombs
Hot cocoa bombs surged in popularity around 2020, largely due to their viral appeal on social media platforms like TikTok and Instagram. People were captivated by the visual experience of watching the chocolate spheres melt and release their contents into a steaming mug of milk.
However, the concept is not entirely new. Encasing ingredients in chocolate has been a technique used for centuries in the making of truffles and other confections. Hot cocoa bombs are a modern twist on this idea, combining the rich tradition of hot chocolate with the interactive fun of a DIY project.
Their rise in popularity can also be attributed to the growing trend of at-home culinary projects. This trend is especially prominent during the holiday season, when people are looking for festive and creative ways to enjoy time with family and friends.
The Cultural Significance of Hot Cocoa
Hot cocoa is more than just a comforting drink. It’s a beverage with deep cultural roots and a long history. Originating from the ancient Mayans who brewed a drink from ground cocoa beans, water, and spices, hot chocolate has evolved into a sweet, creamy treat enjoyed around the world.
In many cultures, hot cocoa is associated with warmth, comfort, and togetherness. People often enjoy it during the colder months or as a special treat during the holidays. The introduction of hot cocoa bombs adds a playful and modern twist to this beloved tradition, making it an experience to be shared and celebrated.
Frequently Asked Questions
1. How long do hot cocoa bombs last?
Hot cocoa bombs can last for up to two weeks when stored properly in an airtight container at room temperature. If you live in a warm climate, you may want to store them in the refrigerator to prevent the chocolate from melting.
2. Can I use water instead of milk with hot cocoa bombs?
Yes, you can use hot water instead of milk to dissolve the cocoa bombs. However, the result will be less creamy. For a richer and more indulgent hot chocolate, hot milk is recommended.
3. Why didn’t my hot cocoa bomb melt properly?
If your hot cocoa bomb didn’t melt as expected, the milk might not have been hot enough. Make sure your milk is steaming hot before pouring it over the bomb. Also, ensure that the chocolate shell isn’t too thick, as this can slow down the melting process.
4. Can I make hot cocoa bombs without a mold?
While molds are ideal for achieving perfectly round cocoa bombs, you can get creative with other tools. For example, you can use silicone muffin cups or even shape the chocolate by hand, though this requires a bit more skill.
5. What should I do if my chocolate shells break?
If your chocolate shells break, don’t worry! You can remelt the chocolate and try again. Make sure to apply multiple thin layers of chocolate to build up the strength of the shells, and handle them gently when removing them from the molds.
Conclusion: The Joy of Making Hot Cocoa Bombs
Making hot cocoa bombs at home is a rewarding experience that combines creativity with culinary skills. These delightful treats are perfect for cozy winter nights, festive gatherings, or as thoughtful homemade gifts. With the tips and techniques outlined in this guide, you’ll be well on your way to creating beautiful and delicious cocoa bombs that are sure to impress.
Whether you’re a seasoned chocolatier or a beginner in the kitchen, hot cocoa bombs offer a fun and satisfying project that brings a touch of magic to the simple pleasure of hot chocolate.